
Knitted Lights
Update: Knitted Lights Kits are now available on Etsy!
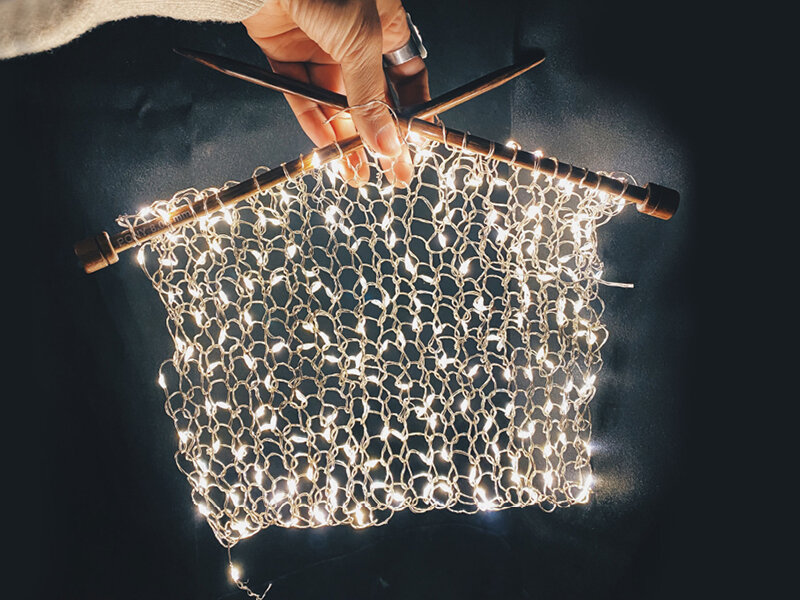
Knitted lights are lighting up the world. They’ve been a kind of light therapy for me and it seems a number of others, too, knitter style. Below are “pattern” instructions to knit a basic stockinette swatch out of LED fairy lights (as pictured above). New variations will be added below as I experiment with various other simple ways to knit with light.
Share your knitted light projects on Instagram using the hashtag #knittedlights and tag me (@leila_raven)—I love seeing everyone’s beautiful creations lighting up our online spaces in the darkening days this winter.
Knitted Lights Pattern - ORIGINAL
Knit a simple swatch of light in stockinette stitch
Finished dimensions approx. 9” x 7”, excluding needles
Keep stitches somewhat loose throughout so needle tips fit easily through the wire loops.
With size US 11 (8mm) needles and LED string lights (66ft [20m] in length), beginning at the end closest to the USB power source, cast on 23 stitches using backward loop cast-on.
Next row (WS): Purl.
Next row (RS): Knit.
Repeat last 2 rows in stockinette stitch until you near the end of your lights - approx 19 rows worked total.
Final row: Knit 12 stitches and stop, leaving remaining tail end at middle of work.
Finishing: Leave stitches on the needles and tighten them if necessary so they don’t slip out. “Block” stitches by opening the wire fabric up by hand until stitches are relatively even.
Hang on wall using a picture hook placed through a center stitch below the needles, with needles crossed at the center (see photo above).
Variation: Work in garter stitch. Knit every row instead of alternating knit and purl rows. Note that finished dimensions may be different.
Knitted Lights Pattern - LACE
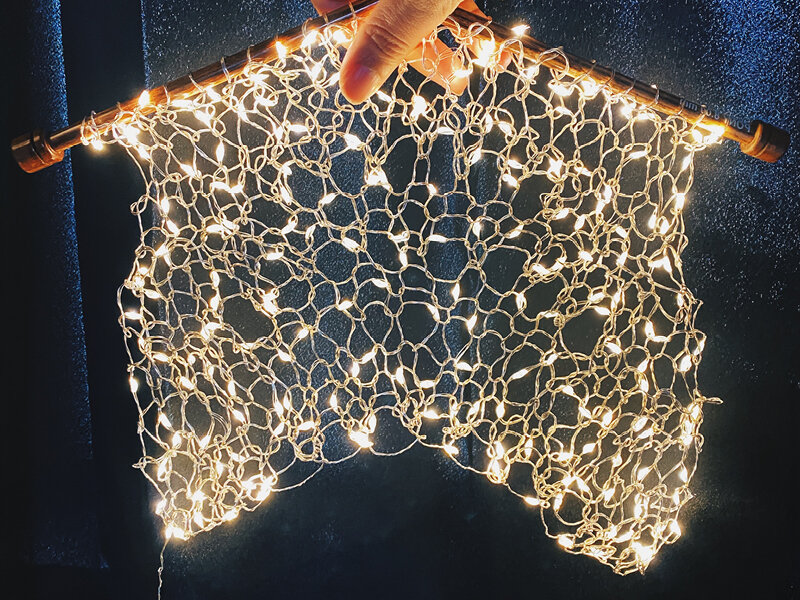
Eyelets and dropped stitches create a wavy openwork fabric in light
Finished dimensions approx. 10” x 7” (measured along side edge), excluding needles
This version is somewhat trickier to knit in wire due to the decreases used in the lace pattern. Remember to keep stitches loose enough to fit the needle tips in the loops. It may also help to open up the fabric by hand after working each lace and drop-stitch row to assess the evenness of your tension and adjust working with the wire if needed.
With size US 11 (8mm) needles and LED string lights (66ft [20m] in length), beginning at the end closest to the USB power source, cast on 23 stitches using backward loop cast-on.
Row 1 - Lace Row (RS): (K2tog) 4 times, (yo, k1) 7 times, yo, (SSK) 4 times.
Rows 2, 4, 8, 10, 12, 14, and 16 (WS): Knit.
Rows 3, 7, 11, and 15 (RS): Knit.
Row 5 - Drop-Stitch Row: (K1, yo) to last stitch, k1. (Note: the yarnovers created on this row will be dropped on the following row. You will have temporarily increased to 45 stitches on the needles.)
Row 6: K1, (drop yarnover off left needle without knitting it, knit next stitch) to end. 23 stitches on needles.
Rows 9 and 13: Work Row 1 - Lace Row.
Row 17: Work Row 5 - Drop-Stitch Row.
Row 18: Work Row 6.
Row 19 - Final Row: Knit.
Finishing: (Note: Rather than binding off, you will leave the stitches on the needles.) Distribute live stitches evenly on both needles so that tips are approximately at center of work—12 stitches on right needle, 11 stitches on left needle.
“Block” stitches by opening the wire fabric up by hand until stitches are relatively even, paying special attention to the Lace and Drop-Stitch rows. Hang on wall using a picture hook placed through a center stitch below the needles, with needles crossed at the center.
Knitted Lights Pattern - SHAWL
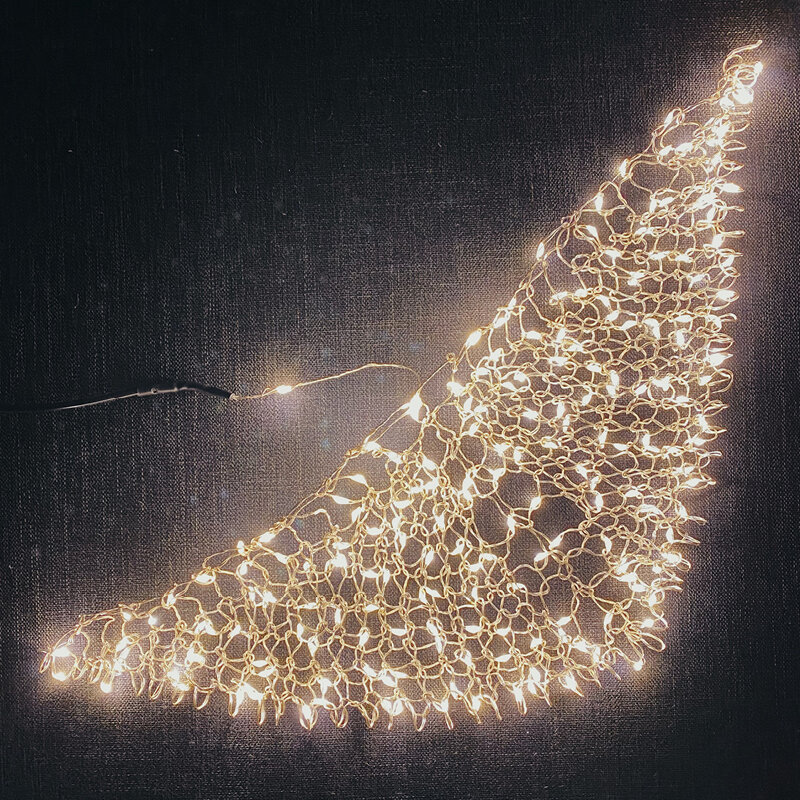
Center-out increasing with yarn-overs to form a classic triangle shape
Finished dimensions approx. 16” along top edge x 6” center spine, without needles
For this version I wanted to see what classic triangular shawl construction would look like. To me it resembles a moth! Increasing 4 stitches on every right side row and 2 stitches every wrong-side row is one of the simplest ways to begin a triangular shawl, which I always seem to have at least one of on the needles at all times. For these lights, though, I took the needles out altogether and didn’t bind off, either - the stitches stay put, and have room to open up the full length of the bottom edges unhindered.
With size US 11 (8mm) needles and LED string lights (66 ft [20m] in length), beginning at the end closest to the USB power source, cast on 3 stitches using backward loop cast-on.
Row 1 (RS): K1, yo, k1, place marker, yo, k1. 2 sts increased.
Row 2 (WS): K1, yo, k to last st, yo, k1. 2 sts increased.
Row 3 (RS): K1, yo, k to marker, yo, k1, yo, k to last st, yo, k1. 4 sts increased.
Repeat rows 2 and 3 until you reach the end of your lights, ending after a row 2 (approx. 17 rows worked total).
Finishing: (Note: Rather than binding off, you will leave the stitches “live”.) Remove needles and turn project upside down to hang, with cast-on edge at top. Pinch live stitches or thread through with spare wire if you’re worried about them slipping out of the final unworked row.
“Block” stitches by opening the wire fabric up by hand until stitches are relatively even and symmetrical. Hang on wall using a picture hook placed through a center stitch at the cast-on edge.
Variation: If you prefer the power cord of the lights to extend from the “bottom” point instead, cast on with the opposite end of the lights, and complete the final row partially, ending at the center stitch.
Abbreviations
WS - wrong side; RS - right side; k - knit; k2tog - knit 2 together; yo - yarn over; SSK - slip, slip, knit.